Qwen Image 2.1 Tutorial: How to Turn Separate Portraits into One Natural Group Photo
A step-by-step guide to Qwen Image 2.1 on Image 3 AI: multi-person face consistency, native transparent PNGs, readable typography, and 2K image generation.
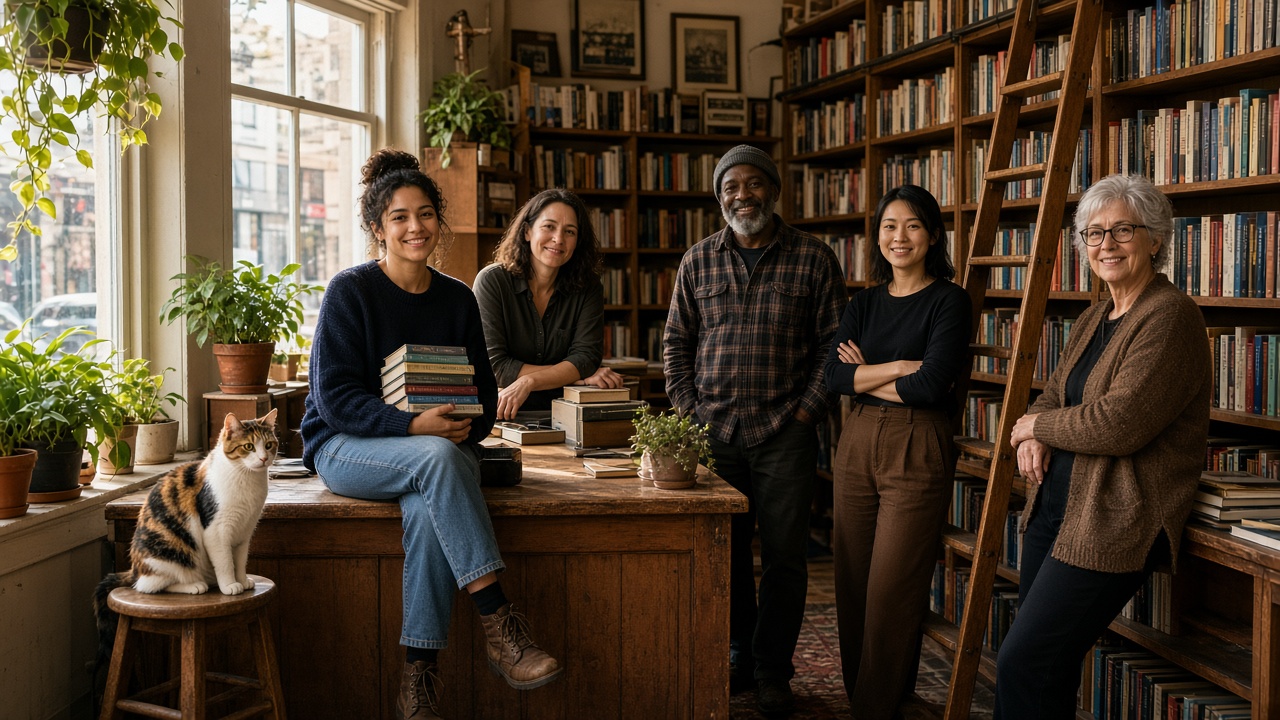
Getting a cohesive group photo is surprisingly hard. Team members live in different cities, family schedules rarely align, and gathering everyone in the same room with professional lighting is often impractical. Past AI generators struggled with this: feeding them individual portraits usually resulted in distorted faces, blended features, or everyone looking suspiciously like the same person.
The release of Qwen Image 2.1 changes that. By natively supporting up to 10 reference images, the model can preserve the distinct facial features and hairstyles of multiple individuals while placing them together under consistent scene lighting and natural perspective.
You don't need a local high-end GPU or complex Python scripts. Inside the Qwen Image 2.1 online workspace, you simply upload your portraits, describe the scene, and generate native 2K images directly in your browser. Each run costs 8 credits, and failed tasks are automatically refunded to your balance.
In this guide, we'll use the cover image above—five independent bookstore staff members gathered inside a sunlit shop—as a practical walkthrough, along with four versatile workflows Qwen Image 2.1 handles best.
What Makes Qwen Image 2.1 Different?
Beyond standard text-to-image generation, Qwen Image 2.1 stands out in three critical areas: multi-image identity consistency, native RGBA transparency, and accurate bilingual typography.
Here is how those capabilities map to real-world creator and commercial tasks:
| Use Case | What You Provide | What You Get |
|---|---|---|
| Multi-Person Group Photos | 2–10 individual portraits + scene prompt | A cohesive group photo preserving each person's likeness in unified lighting |
| Cutouts, Stickers & Merchandise | Subject description + Transparent mode | A clean PNG with a native alpha channel—no manual background removal needed |
| Signage, Posters & Branding | Words enclosed in quotation marks | Crisp, legible text rendered on store boards, chalkboards, or product labels |
| Background Replacement & Relighting | 1 portrait (or product photo) + new scene description | The original subject seamlessly integrated into fresh lighting, depth, and setting |
Step 1: Open the Workspace and Configure Your Panel
Head over to the Qwen Image 2.1 Generator. The model selector will already have Qwen Image 2.1 chosen. Sign in before clicking Generate; your prompt and uploaded reference files are preserved in your local draft, so you won't lose your work if you take a moment to log in.
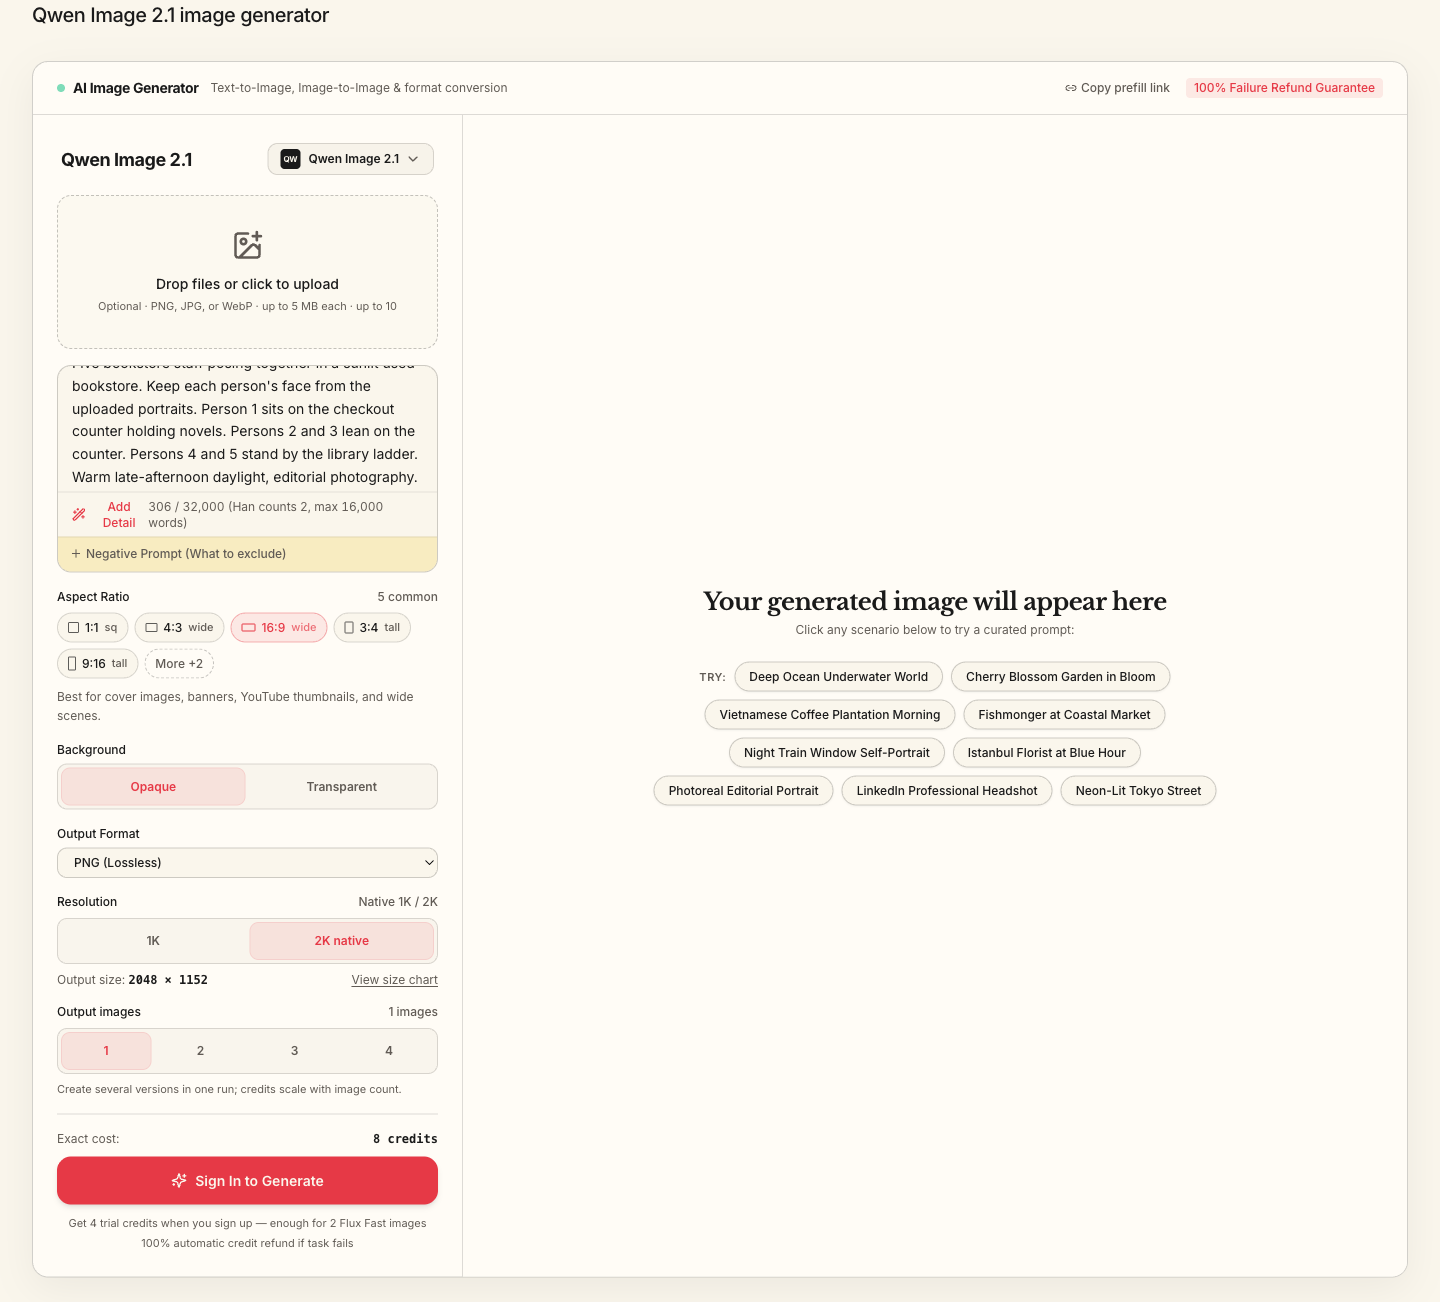
For our bookstore staff portrait, use these recommended settings:
| Setting | Recommended Value | Why It Matters |
|---|---|---|
| Model | Qwen Image 2.1 (8 credits) | Optimized for multi-reference identity retention and sharp typography |
| Reference Images | 5 individual portraits | Accepts JPG, PNG, WebP (up to 5 MB per file, max 10 images) |
| Aspect Ratio | 16:9 (2048 × 1152) | Widescreen framing provides ample room for multiple people and atmospheric depth |
| Background | Opaque | Realistic scenes require environmental lighting, floor reflections, and background depth |
| Output Format | PNG (Lossless) | Uncompressed quality preserves facial details, hair edges, and subtle gradations |
| Resolution | 2K Native | Ensures individual faces and background textures remain sharp and distinct |
| Output Count | 1 image | Generate single runs first while dialing in composition and likeness |
💡 Tip on Reference Photos: While you can upload up to 10 images, quality matters more than quantity. Five well-lit front-facing portraits without sunglasses or heavy filters will yield significantly better results than ten low-resolution crops from crowded snapshots.
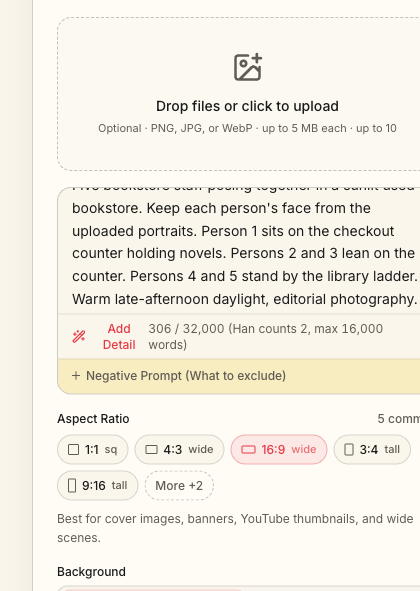
Practical Example A: Assembling a Team Photo from Separate Headshots
This is where Qwen Image 2.1 truly excels. Gather individual photos of your team members and upload them into the reference slot. In your prompt, refer to each person according to their upload order (Person 1, Person 2, Person 3, etc.) to specify their exact position and action:
Editorial group photograph of five independent bookstore staff inside a
sunlit used bookstore with oak shelves, street-facing windows, potted
plants, and a calico cat on a wooden stool. Keep each person's face and
hairstyle from the uploaded portraits. Person 1 sits on the checkout
counter holding a stack of novels. Persons 2 and 3 lean on the counter.
Persons 4 and 5 stand beside a rolling library ladder. Warm late-afternoon
daylight, natural smiles, documentary photography.
Breaking Down the Prompt Structure:
- Scene and Atmosphere: A sunlit secondhand bookstore featuring oak shelves, street-facing windows, potted greenery, and a calico cat on a stool;
- Identity Retention Directive: The explicit instruction
Keep each person's face and hairstyle from the uploaded portraitsensures the model locks onto facial structures; - Spatial Distribution:
Person 1sits on the checkout counter holding books;Persons 2 and 3lean against the counter;Persons 4 and 5stand next to the rolling library ladder;
- Lighting and Mood: Warm late-afternoon sunlight, authentic smiles, and a documentary photography aesthetic.
If faces appear slightly soft or limbs overlap unexpectedly, add this to the negative prompt: extra people, fused faces, distorted eyes, blurry faces, sunglasses.
Refining Without Starting Over:
If your generation looks fantastic overall but one person (for instance, Person 4) drifted slightly from their reference, don't discard the whole prompt. Click Remix on your generated image and make a targeted adjustment:
same bookstore group photo, keep persons 1–3 and 5, replace person 4 with the face from reference 4
This tells the model to maintain the successful composition and adjust only the specified subject.
Adapting This Workflow to Other Scenarios:
Once you master the formula of Portraits + Spatial Description + Identity Retention, you can apply it anywhere:
- Family Gatherings: Take casual individual snaps of family members and create a warm holiday portrait around a dining table;
- Sports & Adventure Crews: Combine selfies of your hiking or climbing buddies into an after-hours gear shot at the bouldering gym;
- Podcasters & Remote Startups: Create a shared studio photograph for teammates who have never shared physical office space;
- Fashion & Lookbook Styling: Upload a model's portrait alongside separate photos of a jacket, shoes, trousers, and bag to composite a complete street-style outfit.
Practical Example B: Stickers with Native Transparent Backgrounds
Creating stickers, app icons, enamel pins, or e-commerce cutouts usually involves painstaking manual background removal or dealing with fringing and halos around hair and edges.
Qwen Image 2.1 includes native RGBA transparency. When you toggle Background to Transparent, the workspace automatically locks the format to PNG and instructs the model to generate a true alpha channel directly.
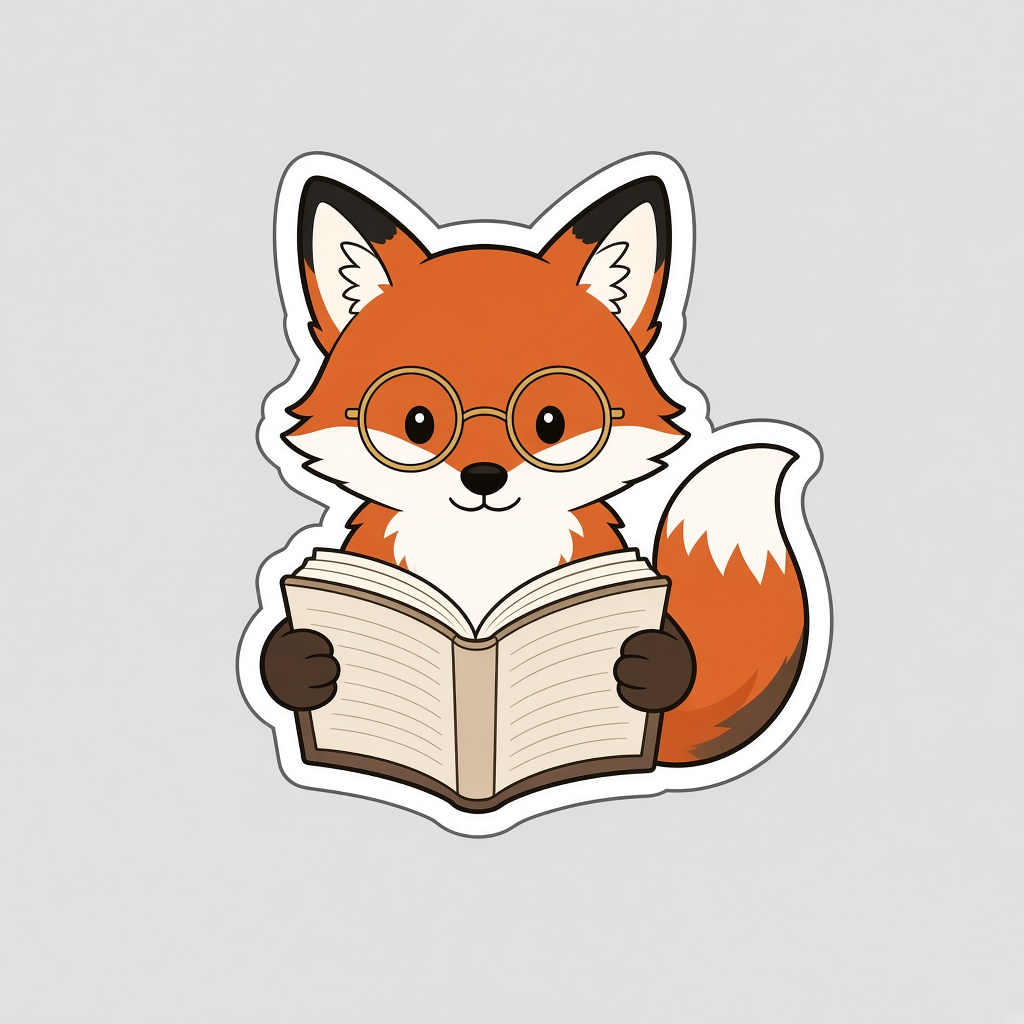
Recommended setup: 1:1 square aspect ratio, 2K native (2048 × 2048), Transparent background, PNG format.
Die-cut enamel pin illustration of a small red fox wearing round wire
glasses and holding an open paperback, thick clean outline, flat color,
merch-ready sticker, isolated subject, generous empty margin.
When you download the resulting PNG and open it in preview software or Photoshop, the area surrounding the character is completely transparent—ready to drop straight onto product mockups, merchandise templates, or websites.
💡 Product Isolation: You can also use this feature to lift a specific item from an existing photo. Upload the original picture, turn on Transparent, and prompt:
extract the ceramic mug only, keep the glaze highlights, no table, transparent background.
Practical Example C: Shop Signage with Readable Typography
Rendering legible text has long been an AI image Achilles' heel. Qwen Image 2.1 significantly improves typography accuracy, making it reliable for store signs, menu boards, and branded merchandise.
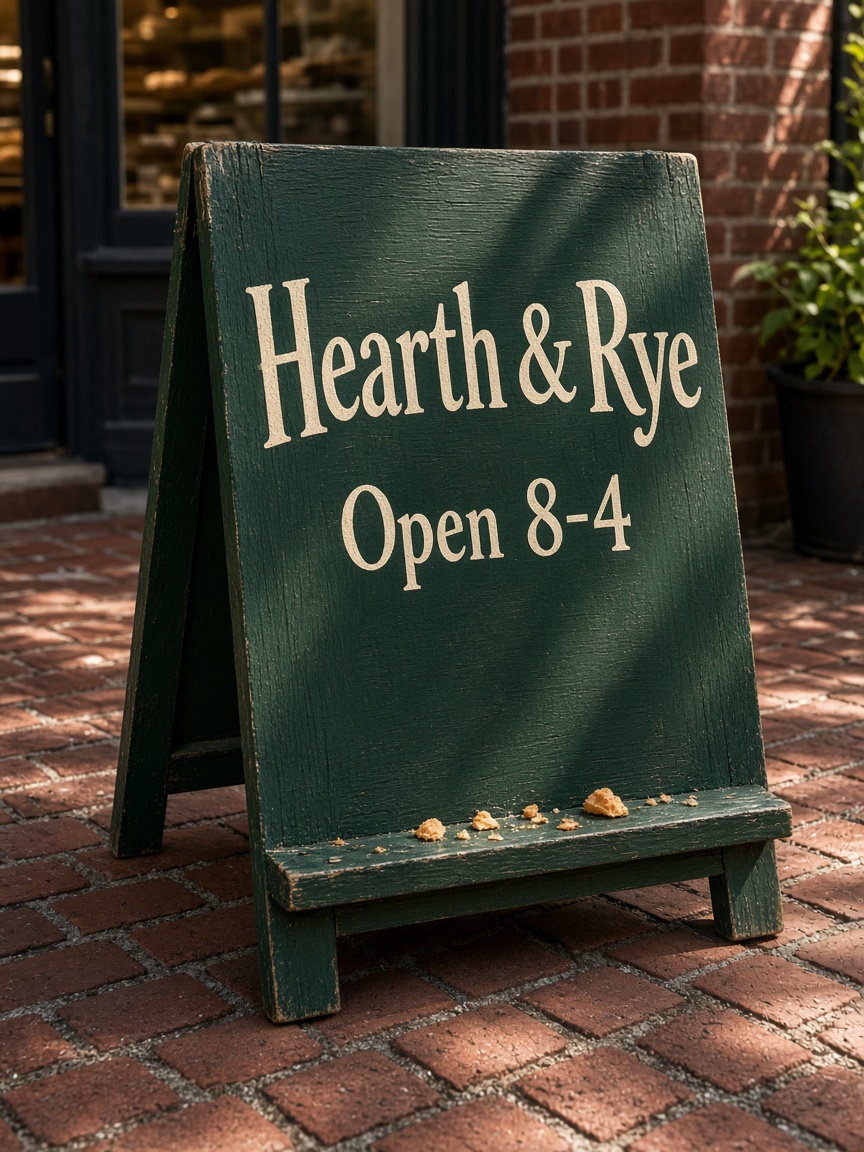
Recommended setup: 3:4 aspect ratio, Opaque background, 2K native (1536 × 2048).
Photorealistic sidewalk sandwich board outside a small neighborhood bakery.
Dark green painted wood with cream hand-lettered text that reads
"Hearth & Rye" on the top line and "Open 8-4" on the second line.
Morning sunlight, brick sidewalk, a few pastry crumbs on the board ledge.
Best Practices for AI Typography:
- Always Use Double Quotes: Enclose exact wording in quotation marks (e.g.,
"Hearth & Rye","Open 8-4"); - Specify Layout Lines: State which phrase belongs on the top line versus the bottom line;
- Keep Copy Concise: Short brand names, hours, and slogans render with high reliability. Avoid crowding the image with dense paragraphs or fine nutritional text.
Practical Example D: Changing the Scene While Keeping the Person
If you already have a great portrait or product photo and just want to transport the subject into a completely different environment, the workflow is remarkably quick:
Upload one existing photo into the reference slot, keep the background Opaque, and instruct the model to replace the surroundings:
Keep the person from the reference. Replace the indoor background with a
rainy city sidewalk at dusk, wet pavement reflections, shallow depth of
field, same clothing and pose.
Instead of simply pasting the cut-out figure onto a new backdrop, Qwen Image 2.1 re-lights the subject so ambient reflections, shadows, and color temperatures naturally blend with the new setting.
Frequently Asked Questions (FAQ)
1. Do I always have to upload reference photos?
No. If you just want standard text-to-image creation (like concept art, architectural renders, or landscape illustrations), leave the reference slot empty and write your prompt. Reference images are only needed when you want to lock specific faces, products, or clothing items.
2. Is the transparent background genuinely transparent?
Yes. With the Transparent toggle enabled, the output is a true RGBA PNG with an embedded alpha channel. It opens with transparency in graphic editors and renders seamlessly over any background on the web without manual clipping.
3. Should I choose 1K or 2K resolution?
2K native is the default and recommended resolution (e.g., 2048 × 1152 for 16:9). If you are quickly sketching ideas or exploring variations, 1K is fine; when you need crisp facial likenesses and sharp letterforms, 2K provides noticeably superior fidelity.
4. What if a generated face doesn't closely match the reference?
- Ensure your input portrait has clear lighting, sharp focus, and an unobstructed view of the face;
- Double-check that your prompt includes an explicit likeness clause (
Keep each person's face and hairstyle from the uploaded portraits); - Verify that
Person 1,Person 2, etc. match your upload sequence; - Use the Remix button to adjust only the person who needs refinement without restarting from scratch.
5. When should I use Qwen Image 2.1 instead of Flux?
Flux models are fantastic for general photorealism and artistic styling, but they do not support multi-image face consistency or native transparent PNG output. When your task requires multi-person group photos, reliable likeness retention, transparent cutouts, or clear typography, Qwen Image 2.1 is the ideal choice.
Try It Now: Create Your Own Group Scene
Ready to test it with your own photos? Open the Qwen Image 2.1 Generator, upload individual portraits of your friends, family, or team, paste the prompt template above, and generate your 2K scene in minutes.
Related Guides & Prompt Templates:
- Holographic Die-Cut Sticker Design: Create vibrant vinyl badges and custom merch
- Character Turnaround Sheet Guide: Maintain multi-angle character consistency